


The Side Panel Strategy: How to Turn a Simple Shelter into a Fully Enclosed Room
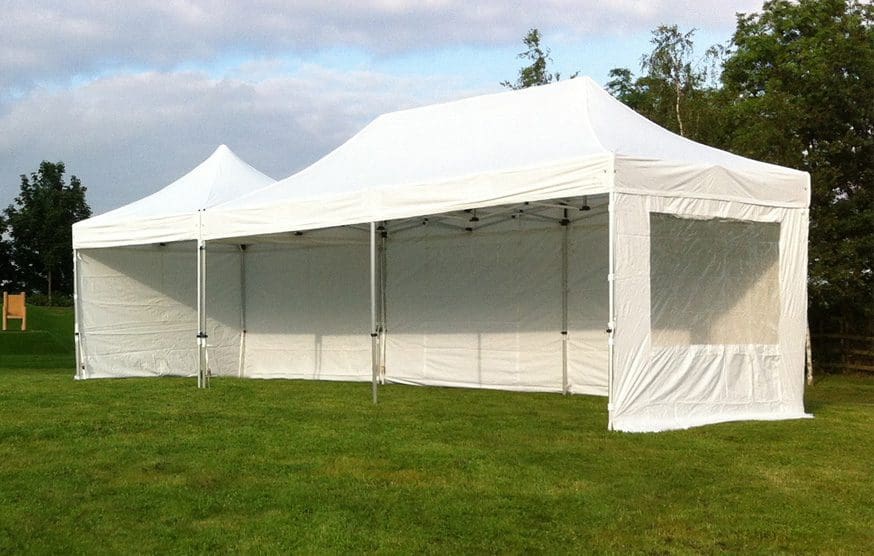
A pop-up gazebo is great when the sun is shining, but open sides have their limits. Wind and rain can still get in and people can see your stock or guests. Adding side panels solves these problems and makes your gazebo feel more like a real room. With a full set, you get shelter, privacy and a space you can use in any weather.
This guide explains what gazebo side panels do, the main types you can choose from and how to fit them properly. We explain each step, from checking if the panels fit your gazebo to making sure every seam is secure.
Whether you run a market stall, host garden parties or manage a commercial pitch, the steps are the same. If you fit the panels well, your shelter will be much more useful.
Why Side Panels Are the Upgrade Worth Making
An open gazebo gives you shade from the sun, but it doesn’t protect much against wind or heavy rain. Adding panels covers your space on all sides, not just above. This is especially important at events and market stalls, where your contents need more than just light rain protection.
Panels also give you more privacy and security. A solid wall stops people from looking at your stall when you are closed. Closed sides keep private garden gatherings out of sight. The extra protection means you can use your gazebo for more of the year. A fully enclosed gazebo works well on cold autumn evenings or at early spring events that might otherwise be too cold or wet.
To learn more about keeping your shelter watertight, check our guide to waterproof gazebo fabric, which explains denier ratings and PVC coatings.
Choosing the Right Gazebo Side Panels for the Job
Side panels come in different sizes and types. Most sets have solid panels for full coverage, window panels to let in light, and door panels so people can come and go without unfolding a whole wall. A standard four-panel set usually has two window panels, a zipped doorway and one solid panel, which suits most needs.
Solid panels give you full privacy and the best protection from wind and rain. Window panels let in light and often have a zip-up blind for privacy. This is great for market stalls that need to look open during the day but stay secure at night. Door panels have a double zip so you can roll them up and keep them open for easy access.
Check our replacement sidewalls to see which combinations are available for your gazebo model. You can also replace just one worn panel instead of buying a whole new set.
How to Fit Gazebo Side Panels Before You Start
Preparing well makes fitting side panels much easier. First, check that each panel matches your gazebo model, as sidewalls are made for specific frame sizes and won’t fit others. Lay the panels out on the ground so you can see where each edge goes before you start attaching them, especially if you’re working at height or in windy conditions.
If possible, pick a calm, dry day to fit your panels. Wind can make large panels hard to handle and might even lift the gazebo if only one side is partly attached. It is much easier with two people: one can hold the panel while the other secures it.
How to Attach Gazebo Side Panels to the Frame
Most gazebo side panels are attached in three steps. The order is important: start at the top by running the Velcro strip along the panel’s top edge and attaching it to the matching strip on the canopy or roof. Go along the whole width so the panel hangs evenly before you move on.
Next, fasten the Velcro bands inside the panel to the frame legs at regular intervals on each side. This prevents the fabric from flapping in the wind and helps the panel sit flat against the frame. For corner panels, make sure both edges are tight before you attach the last band.
Finally, zip the panels together along their vertical edges, starting at the top and working down so you do not catch any fabric in the zip. After you attach all the panels, walk around the gazebo and look for gaps at the bottom or in the corners. Even small gaps can let wind in and put extra strain on nearby panels.
Getting a Secure, Weatherproof Fit
Just because a panel looks fitted does not mean it’s secure. Pull each Velcro join tight instead of just pressing it on. Loose joins are the main reason panels come off in strong wind. Check the joins again after the first windy day, as the fabric and frame can shift a bit once you start using them.
The ground level is usually the weakest part of most setups. If you can, use pegs through the eyelets to pin panels down, or add gazebo weights if you can’t use pegs. Keeping the base secure stops the panels above from coming loose and prevents rain from accumulating at the bottom.
For more details on anchoring on different surfaces, check our guide to securing a gazebo on concrete or grass.
Matching Panels to Your Gazebo Model
Fitting panels is easy, as long as they match your gazebo. Our Pro 30, Protex 40, and Protex 50 ranges all have different frame sizes, so the panels are made for each model, not as universal fits. If you are not sure which sidewalls you need, check the model name on your gazebo or contact us, and we will help you find the right ones.
If just one panel is worn out or torn, it’s usually cheaper to replace that piece instead of the whole gazebo. Our guide to gazebo spare parts explains how to check your components and order the right part the first time.
Ready to Enclose Your Space?
Side panels make a basic gazebo into a shelter you can count on in almost any weather, day or night. The right mix of panels gives you privacy, protection and easy access. If you fit them well, with strong Velcro joins and a secure base, they’ll last through the whole season.
If you’re still choosing the right sidewalls for your gazebo, or need help matching parts to your frame, we’re here to help. Contact Sun Leisure today and we’ll help you turn your shelter into a fully enclosed room, no matter what the UK weather brings.